While Android has matured by leaps and bounds, it's still going through the refinement phase. Over time, Google has both added and removed many popular features in Android. Sometimes the features are completely removed. However, in many cases, they make it to the Settings page or they are buried under different hidden places inside Android. That's why we have come up with this article where we unearth 15 hidden Android features that are quite interesting and helpful. So, let's go ahead and explore some unique Android features which are available on our Android devices.

Hidden Android Features
Here, we have mentioned several hidden Android features ranging from privacy, security, ease of use and more. Further, we have also added some obscure Android features which were released recently but might have gone under the radar. Now with that said, here are the hidden Android features that you should know and use often.
1. Block Spam Calls
The one feature that I turn on whenever I set up a new Android device is: filter spam calls. It saves me from unwanted calls by telemarketers, fraudsters and spammers. If you use a stock Android device, you must have the Phone app by Google installed as your default dialer. To enable spam call blocking, open the Phone app and tap on the three-dot menu on the top-right corner and open Settings. After that, open "Caller ID and spam" and enable both the toggles. Now, whenever you will receive a call by spammers, the screen won't light up or make any sound. It's almost like DND with Total Silence turned on.
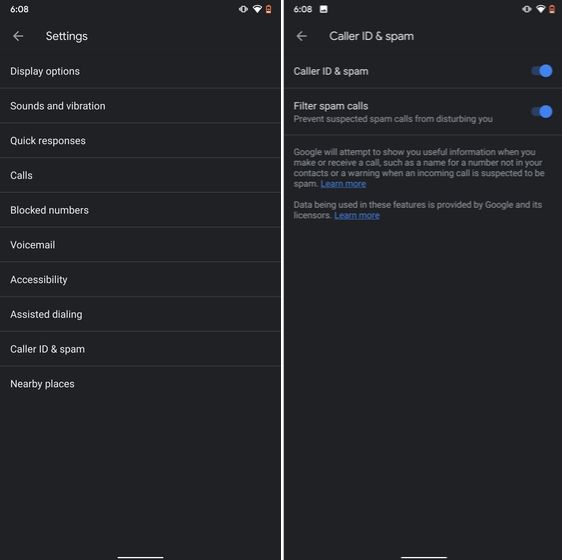
If you are worried that you will miss important calls then fret not. I have been using this feature for a long time and I can vouch that it works flawlessly. While there are other apps like Truecaller with similar features, you should be wary against handing your data to third-party apps, especially given its shady past record.
2. Verification Code Autofill
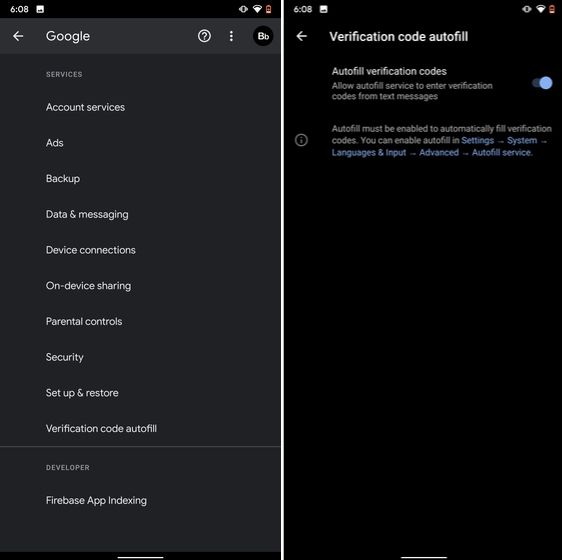
Many of us have allowed SMS permission to multiple apps for seamless OTP verification. However, this can lead to serious breach as apps can read all your text messages and also build credit profile without your consent. To crack down on this behavior, Google has brought a new API called the SMS Retriever. It allows apps to capture a one-time code without asking for SMS permission. In case, the app developer has not implemented this API, Google will act as a bridge and provide the verification code. That is awesome, right? So to enable this feature, navigate to Settings -> Google -> Verification Code Autofill and enable the toggle. Make sure you have also enabled the Autofill service by Google.
3. Force Dark Mode on all Apps
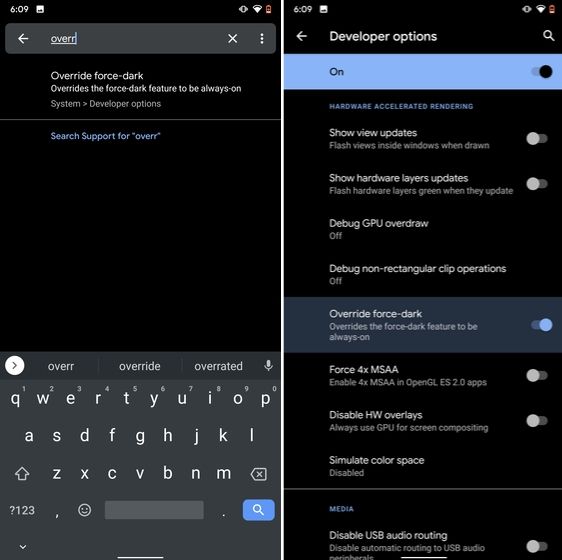
While the dark mode is slowly becoming the norm, there are still apps like Facebook and WhatsApp which are yet to embrace the dark side. If you want to force dark mode on a range of apps then there is a hidden Android setting that lets you do it. However, you must be on the latest Android 10 build. To enable dark mode for all the apps, navigate to Settings -> About Phone and tap on the Build Number for seven times continuously. A toast notification will show up prompting "Developer Options have been enabled". Now go back, and search for "Override force-dark" in the Settings page. Tap on the first result and then enable the toggle. Just to be sure, restart your device and check if dark mode is working on all apps.
4. Focus Mode
Google has brought a new feature called Focus Mode to Digital Wellbeing with the launch of Android 10. While Digital Wellbeing is great at limiting the screen time of various apps, Focus Mode allows you to block certain apps completely so you can focus on what you are doing. To configure Focus Mode, follow Settings -> Digital Wellbeing -> Focus Mode. Here, you can select apps that you find distracting and can enable Focus Mode straight from the Quick Settings panel.

5. Share WiFi with QR Code
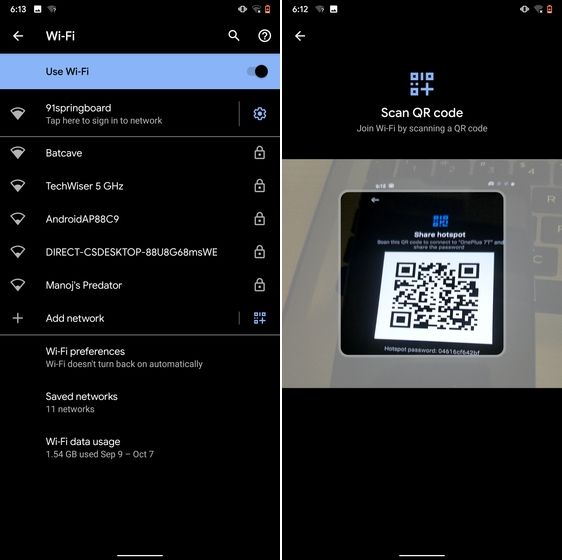
I know the feeling when someone asks you to share your WiFi's password and you can't seem to remember it. If you use a strong password with multiple hashes and characters then it becomes even more tedious to type it out. In such cases, a QR code can help you seamlessly connect to WiFi networks. Thankfully, Android 10 has this not-so-hidden feature under the WiFi Settings page. Open it and you will find the QR code scanner besides the "Add Network" section. Now, scan the QR code and you will be connected in no time.
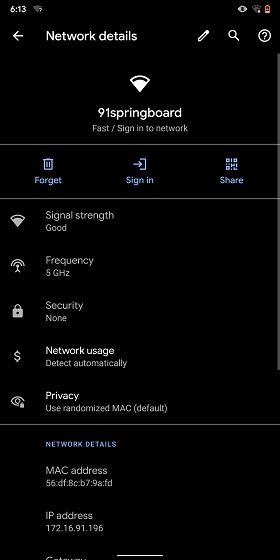
6. Randomize MAC Address
MAC address is a unique identifier assigned to WiFi-enabled devices including smartphones. Most devices come with a static MAC which can be exploited and used for tracking user movement. So having a random MAC address reduces the chance of tracking and strengthens your privacy. If you are running Android 10 then you can randomize the MAC address from the WiFi Settings page. Tap on the WiFi that you are connected to and open "Privacy". Here, make sure "Use randomized MAC" is your default pick.
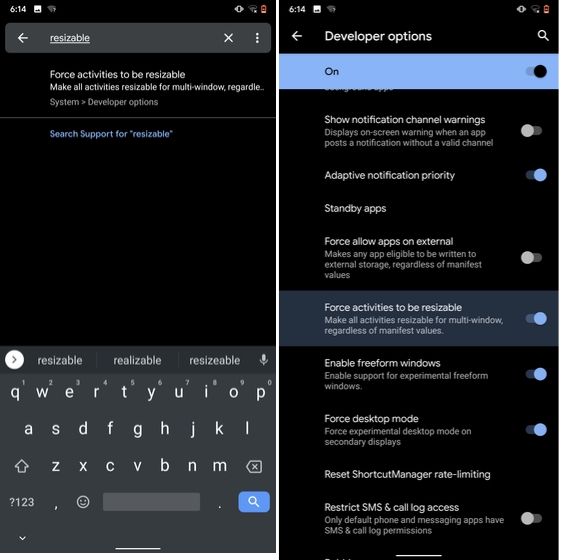
7. Force Apps to Resize in Split Mode
Android has some unique features like Split Mode which make it quite distinct from iOS. It lets you run two apps at once so you can effortlessly multitask between them. However, not all apps support Split Mode and that's where this hidden Android feature comes into play. With this feature, you can force any app to resize in split mode, irrespective of the app compatibility. So to enable this feature, open Settings and search for "resizable". Open the first result and enable "Force activities to be resizable". Now, restart your device and you can enjoy any app in the Split mode.
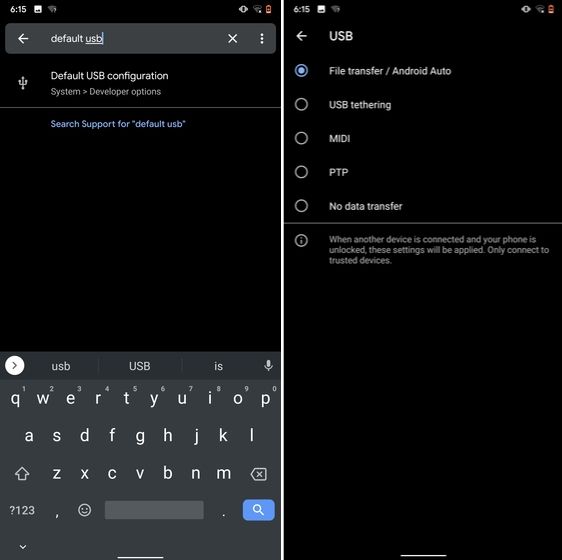
8. Default USB Configuration
If you are someone who regularly connects Android devices to PC then this sneaky feature is going to help you a lot. Android 10 now allows you to choose your default USB configuration. If you transfer files regularly then simply choose the desired settings and you are good to go. To configure USB, open Settings and search for "Default USB" and tap on the first result. Here, choose "File transfer" or any other settings based on your preference.
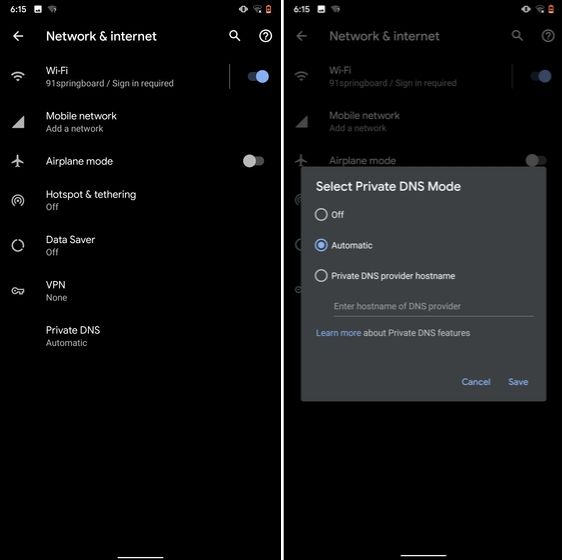
9. Private DNS
While Private DNS was launched with Android Pie, it still remains one of the least talked features of Android. It allows you to encrypt your DNS query so no one can read it, not even your internet service provider. You can find the Private DNS feature in the "Network and Internet" settings page. Here, open "Private DNS" and choose Automatic for Google's DNS or you can also select some other DNS providers as well. I would recommend you to go with Cloudflare's DNS.
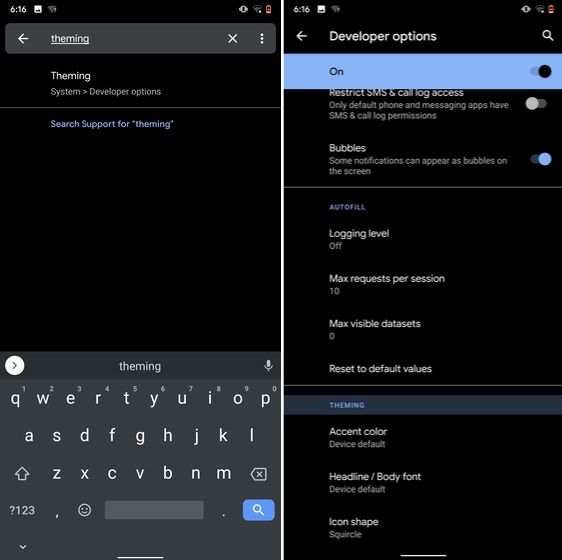
10. Device Theming
Device theming has finally arrived on Android, but it's still hidden under the developer options. You can change the accent color, font and icon shape from a handful of options. To find the desired settings page, open Settings and search for "theming". Tap on the top result and customize your Android device as you prefer.
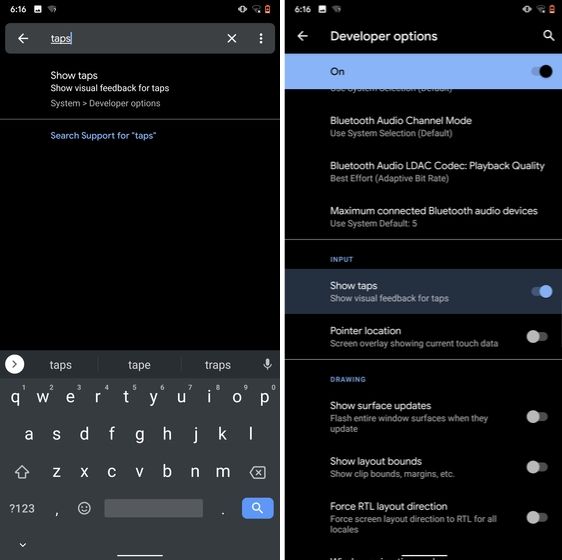
11. Show Taps While Screen Recording
With the release of Android Oreo, Google removed the ability to show taps while screen recording for security reasons. However, the settings to configure taps is still available and hidden under the developer options. Just open the Settings page and search for "taps". Open the first result and enable the toggle. Now, you can record your screen with taps and that's really convenient.
12. Capitalize Words Quickly
If you want to capitalize words quickly then Gboard has this nifty feature which is super helpful and I simply love it. Just select the words and tap the "Shift" button twice to capitalize a chunk of words at once. You can also make it lowercase by similarly double tapping the shift button. And if you just want to keep the initials capital then tap the shift button once. That's pretty great, right? So go ahead and type hassle-free with Gboard.
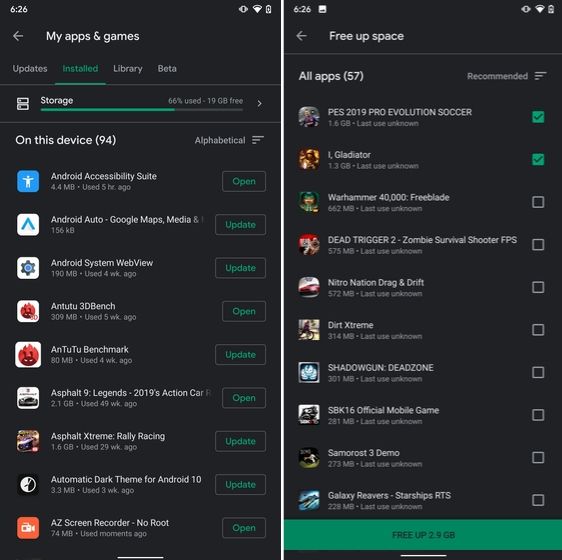
13. Uninstall Multiple Apps
One of the best hidden Android features is that you can uninstall multiple apps at once. It works on older versions of Android as well so that is great. All you have to do is open the Google Play Store and tap on the hamburger menu and select "My apps and games". Here, switch to the "Installed" section and then tap on "Storage". After that, simply select apps that you want to uninstall and hit that "Free Up" button. Voila, multiple apps just got uninstalled in just one tap.
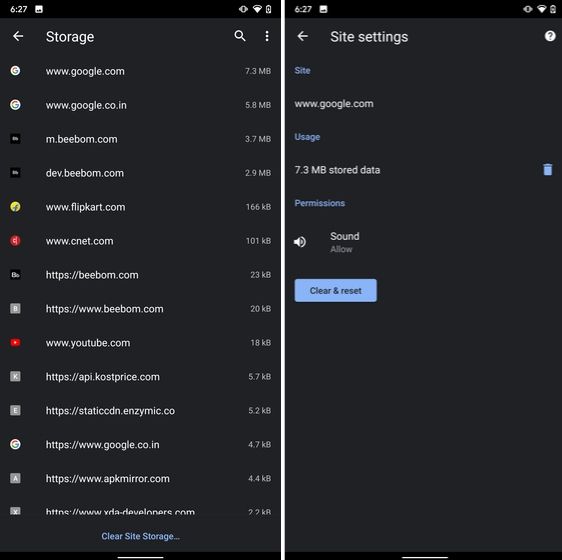
14. Clear Site Storage Using Chrome
Chrome is notorious for accumulating a large amount of data in background which makes the performance worse and also takes up crucial storage space. If you want to check what websites are eating up your memory space then a hidden Chrome setting can help you with that. Open Chrome on your Android device and head over to its Settings page. Now, navigate to Site Settings and open Storage. Here, you will find all the websites with their storage space. Open any website and tap on the "Delete" icon to finally free up your internal storage from unnecessary cached data.
15. Street View Layer in Google Maps
Street View is an immersive way to explore places and find new landmarks, hotels, restaurants from anywhere around the world. Now, the Street View Layer has been added to Google Maps and it works pretty well. To check if Street View is available in your region, open Google Maps and tap on the "layer" icon on the top-right corner. Now, tap on "Street View" icon and then zoom out to find blue lines on the map. Finally, tap on the blue lines and Street View will show up for that place. That's cool, right? So go ahead and check out Street View to find some hidden gems around the world.
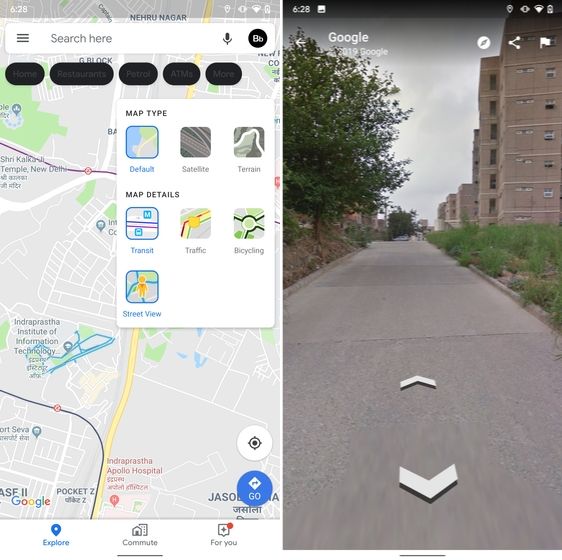
Note: The blue lines show up wherever street view is available.
@EVERYTHING NT


